Thực hiện Face Recognition với FaceNet

1. Nhắc lại bài toán Face Recognition
Face Recognition là bài toán nhận diện người dựa vào khuôn mặt của họ trong hình ảnh hoặc video. Hai trong số các bài toán của Face Recognition là:
- Face Verification: Ánh xạ 1-1, giữa khuôn mặt của một người đưa vào hệ thống nhận diện với một người đã biết trước. Face Verification trả lời câu hỏi: Đây có phải là anh/chị/ông/bà A không?
- Face Identification: Ánh xạ 1-nhiều, giữa giữa khuôn mặt của một người đưa vào hệ thống nhận diện với một tập những người đã biết trước trong CSDL. Face Identification trả lời câu hỏi: Đây là ai?
Trong bài này, chúng ta sẽ sử dụng FaceNet model để thực hiện bài toán Face Recognition.
2. FaceNet model.
FaceNet là một mô hình nhận dạng khuôn mặt được phát triển bởi Florian Schroff và đồng nghiệp tại Google trong bài báo năm 2015 của họ có tiêu đề FaceNet: A Unified Embedding for Face Recognition and Clustering. Trong mô hình này, hình ảnh của một khuôn mặt sẽ được trích xuất các đặc điểm chất lượng cao và biểu diễn thành vector 128 phần tử (Face Embedding vector 128 chiều).
FaceNet, that directly learns a mapping from face images to a compact Euclidean space where distances directly correspond to a measure of face similarity — FaceNet: A Unified Embedding for Face Recognition and Clustering, 2015.
Mô hình là một mạng CNN được đào tạo thông qua hàm Triplet Loss. Nó khuyến khích các Face Embedding vector của cùng một người trở nên giống nhau hơn (khoảng cách nhỏ hơn), trong khi các Face Embedding vectơ của những người khác nhau sẽ trở nên ít giống nhau hơn (khoảng cách lớn hơn). Việc tập trung vào đào tạo một mô hình để tạo ra các Face Embedding vector trực tiếp (thay vì trích xuất chúng từ một lớp trung gian của mô hình) là một đổi mới quan trọng của FaceNet so với VGGFace.
Our method uses a deep convolutional network trained to directly optimize the embedding itself, rather than an intermediate bottleneck layer as in previous deep learning approaches. — FaceNet: A Unified Embedding for Face Recognition and Clustering, 2015.
Các Face Embedding vectors này sau đó được sử dụng như là Input để đào tạo một mô hình phân loại trên bộ dữ liệu tiêu chuẩn về Face Recognition, đạt được kết quả state-of-the-art.
Bài báo cũng đề cập đến các ứng dụng khác của Face Embedding vector, chẳng hạn như phân cụm để nhóm các khuôn mặt giống nhau dựa trên các đặc điểm được trích xuất của chúng. Có thể nó FaceNet là một model rất mạnh mẽ và hiệu quả cho bài toán Face Recognition, và một loạt các ứng dụng khác.
3. Load a FaceNet Model in Keras
Có một số dự án cung cấp các công cụ để huấn luyện các mô hình dựa trên FaceNet (sử dụng Pre-trained FaceNet model). Có lẽ nổi bật nhất là dự án OpenFace. Trong dự án náy, các mô hình FaceNet được xây dựng và huấn luyện bằng PyTorch framework. Keras cũng có 1 dự án tương tự, gọi là Keras OpenFace, nhưng tại thời điểm viết bài, các mô hình đó yêu cầu Python 2, điều này hạn chế chúng ta rất nhiều trong việc tiếp cận các tính ưng ưu việt của Python 3. Vì thế mà Keras OpenFace ít được sử dụng.
Một dự án nổi bật khác là facenet của David Sandberg. Nó cung cấp các mô hình FaceNet được xây dựng và huấn luyện bằng TensorFlow framework. Dự án có vẻ hoàn thiện, mặc dù tại thời điểm viết bài này không cung cấp cài đặt cũng như cách sử dụng API của nó. Một dự án có vẻ hữu ích hơn là Keras FaceNet của Hiroki Taniai. Trong dự án này, tác giả cung cấp một tập lệnh để chuyển đổi mô hình Inception ResNet v1 từ TensorFlow sang Keras. Một Pre-trained model bằng Keras cũng được cung cấp để sẵn sàng để sử dụng. Chúng ta sẽ sử dụng mô hình Keras FaceNet của Hiroki Taniai trong bài viết này. Nó đã được huấn luyện trên tập dữ liệu MS-Celeb-1M. Mô hình có thể được tải xuống từ đây.
4. Detect Faces
Phần này, chúng ta cũng sử dụng thư viện MTCNN tương tự như trong bài trước. Code như sau:
# function for face detection with mtcnn
from PIL import Image
from numpy import asarray
from mtcnn.mtcnn import MTCNN
# extract a single face from a given photograph
def extract_face(filename, required_size=(160, 160)):
        # load image from file
        image = Image.open(filename)
        # convert to RGB, if needed
        image = image.convert('RGB')
        # convert to array
        pixels = asarray(image)
        # create the detector, using default weights
        detector = MTCNN()
        # detect faces in the image
        results = detector.detect_faces(pixels)
        # extract the bounding box from the first face
        x1, y1, width, height = results[0]['box']
        # bug fix
        x1, y1 = abs(x1), abs(y1)
        x2, y2 = x1 + width, y1 + height
        # extract the face
        face = pixels[y1:y2, x1:x2]
        # resize pixels to the model size
        image = Image.fromarray(face)
        image = image.resize(required_size)
        face_array = asarray(image)
        return face_array
# load the photo and extract the face
pixels = extract_face('...')
Chúng ta sẽ sử dụng hàm này để trích xuất các Face Embedding vector để cung cấp làm đầu vào cho mô hình FaceNet trong phần tiếp theo.
5. Face Recognition
Trong phần này, chúng ta sẽ phát triển một hệ thống Face Recongtion để dự đoán danh tính của một khuôn mặt. Model sẽ được huấn luyện và kiểm tra bằng cách sử dụng bộ dữ liệu 5 Celebrity Faces Dataset, bao gồm rất nhiều bức ảnh của năm người nổi tiếng khác nhau. Mô hình MTCNN vẫn được dùng để thực hiện Face Detection, mô hình FaceNet được sử dụng để Face Embedding vector cho mỗi khuôn mặt được phát hiện, sau đó chúng ta sẽ phát triển một mô hình phân loại bằng thuật toán SVM để dự đoán danh tính của khuôn mặt đó.
5.1 5 Celebrity Faces Dataset
5 Celebrity Faces Dataset là một bộ dữ liệu nhỏ chứa các bức ảnh của những người nổi tiếng khác nhau. Nó bao gồm các bức ảnh của: Ben Affleck, Elton John, Jerry Seinfeld, Madonna và **. Bộ dữ liệu đã được cung cấp bởi Dan Becker, bạn có thể tải xuống miễn phí từ Kaggle. Lưu ý, cần phải có tài khoản Kaggle để tải xuống tập dữ liệu này.
Tải xuống tập dữ liệu, file data.zip 2.5MB và giải nén nó trong thư mục làm việc trên máy tính của bạn với tên thư mục 5-Celeb-face-dataset. Bây giờ bạn sẽ có một thư mục với cấu trúc sau:
5-celebrity-faces-dataset
├── train
│   ├── ben_afflek
│   ├── elton_john
│   ├── jerry_seinfeld
│   ├── madonna
│   └── mindy_kaling
└── val
    ├── ben_afflek
    ├── elton_john
    ├── jerry_seinfeld
    ├── madonna
    └── mindy_kaling
Chúng ta có thể thấy 2 thư mục: thư mục train chứa dữ liệu để huấn luyện model và thư mục val chứa dữ liệu để xác thực hoặc kiểm tra model. Nhìn vào một số bức ảnh trong mỗi thư mục, chúng ta có thể thấy rằng các khuôn mặt có nhiều hướng, ánh sáng và kích thước khác nhau. Điều quan trọng là mỗi bức ảnh chỉ có một khuôn mặt của người đó. Nếu bạn muốn sử dụng dữ liệu của riêng bạn, hãy thu thập và tổ chức dữ liệu tương tự như thế này.
5.2 Detect Faces
Bước đầu tiên cần làm là phát hiện khuôn mặt trong mỗi bức ảnh. Ta sẽ sử dụng hàm extract_face() trong phần trước để làm việc này.
# python extract_faces.py --dp '5-celebrity-faces-dataset/train/ben_afflek/'
# demonstrate face detection on 5 Celebrity Faces Dataset
from os import listdir
from PIL import Image
from numpy import asarray
from matplotlib import pyplot
from mtcnn.mtcnn import MTCNN
import argparse

import tensorflow as tf

config_tf = tf.compat.v1.ConfigProto()
config_tf.gpu_options.allow_growth = True
session = tf.compat.v1.Session(config=config_tf)

# extract a single face from a given photograph
def extract_face(filename, required_size=(160, 160)):
	# load image from file
	image = Image.open(filename)
	# convert to RGB, if needed
	image = image.convert('RGB')
	# convert to array
	pixels = asarray(image)
	# create the detector, using default weights
	detector = MTCNN()
	# detect faces in the image
	results = detector.detect_faces(pixels)
	# extract the bounding box from the first face
	x1, y1, width, height = results[0]['box']
	# bug fix
	x1, y1 = abs(x1), abs(y1)
	x2, y2 = x1 + width, y1 + height
	# extract the face
	face = pixels[y1:y2, x1:x2]
	# resize pixels to the model size
	image = Image.fromarray(face)
	image = image.resize(required_size)
	face_array = asarray(image)
	return face_array

def main():
	ap = argparse.ArgumentParser()
	ap.add_argument('-dp', '--data_path', required=True)
	args = vars(ap.parse_args())

	i = 1
	# enumerate files
	for filename in listdir(args['data_path']):
		# path
		path = args['data_path'] + filename
		# get face
		face = extract_face(path)
		print(i, face.shape)
		# plot
		pyplot.subplot(2, 7, i)
		pyplot.axis('off')
		pyplot.imshow(face)
		i += 1
	pyplot.show()

if __name__ == '__main__':
	main()
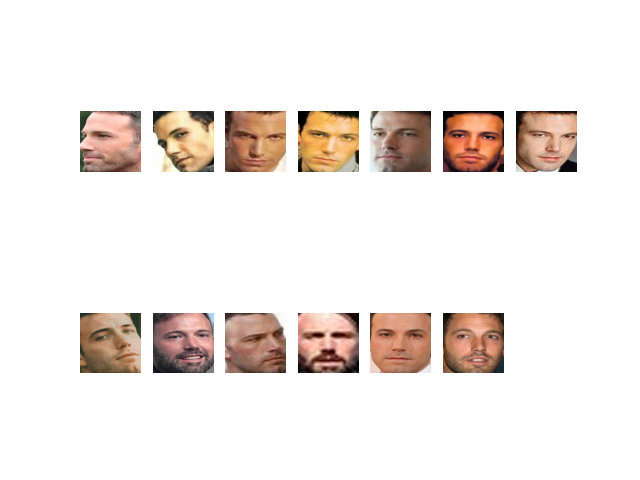
Thử thực hiện với những ảnh của Ben Affleck và thể hiện các khuôn mặt được phát hiện lên đồ thị.
$ python extract_faces.py --data_path '5-celebrity-faces-dataset/train/ben_afflek/'
Kết quả:
Tiếp theo, chúng ta sẽ mở rộng ví dụ này để làm việc với toàn bộ ảnh trong các thư mục train và val. Ta viết hàm load_faces() như sau:
# load images and extract faces for all images in a directory
def load_faces(directory):
	faces = list()
	# enumerate files
	for filename in listdir(directory):
		# path
		path = directory + filename
		# get face
		face = extract_face(path)
		# store
		faces.append(face)
	return faces
Tiếp theo là hàm load_dataset():
# load a dataset that contains one subdir for each class that in turn contains images
def load_dataset(directory):
	X, y = list(), list()
	# enumerate folders, on per class
	for subdir in listdir(directory):
		# path
		path = directory + subdir + '/'
		# skip any files that might be in the dir
		if not isdir(path):
			continue
		# load all faces in the subdirectory
		faces = load_faces(path)
		# create labels
		labels = [subdir for _ in range(len(faces))]
		# summarize progress
		print('>loaded %d examples for class: %s' % (len(faces), subdir))
		# store
		X.extend(faces)
		y.extend(labels)
	return asarray(X), asarray(y)
Việc còn lại là gọi hàm này với các thư mục train và val để tạo ra các Face Embedding của mỗi khuôn mặt và sử dụng chúng để tạo model phân loại.
Gộp tất cả lại, ta có code đầy đủ như sau:
# USEAGE python extract_faces_dataset.py --train_data 5-celebrity-faces-dataset/train/ --val_data 5-celebrity-faces-dataset/val/ --save_data 5-celebrity-faces-dataset.npz
# face detection for the 5 Celebrity Faces Dataset
from os import listdir
from os.path import isdir
from PIL import Image
from numpy import savez_compressed
from numpy import asarray
from mtcnn.mtcnn import MTCNN
import argparse

import tensorflow as tf

config_tf = tf.compat.v1.ConfigProto()
config_tf.gpu_options.allow_growth = True
session = tf.compat.v1.Session(config=config_tf)

# extract a single face from a given photograph
def extract_face(filename, required_size=(160, 160)):
	# load image from file
	image = Image.open(filename)
	# convert to RGB, if needed
	image = image.convert('RGB')
	# convert to array
	pixels = asarray(image)
	# create the detector, using default weights
	detector = MTCNN()
	# detect faces in the image
	results = detector.detect_faces(pixels)
	# extract the bounding box from the first face
	x1, y1, width, height = results[0]['box']
	# bug fix
	x1, y1 = abs(x1), abs(y1)
	x2, y2 = x1 + width, y1 + height
	# extract the face
	face = pixels[y1:y2, x1:x2]
	# resize pixels to the model size
	image = Image.fromarray(face)
	image = image.resize(required_size)
	face_array = asarray(image)
	return face_array

# load images and extract faces for all images in a directory
def load_faces(directory):
	faces = list()
	# enumerate files
	for filename in listdir(directory):
		# path
		path = directory + filename
		# get face
		face = extract_face(path)
		# store
		faces.append(face)
	return faces

# load a dataset that contains one subdir for each class that in turn contains images
def load_dataset(directory):
	X, y = list(), list()
	# enumerate folders, on per class
	for subdir in listdir(directory):
		# path
		path = directory + subdir + '/'
		# skip any files that might be in the dir
		if not isdir(path):
			continue
		# load all faces in the subdirectory
		faces = load_faces(path)
		# create labels
		labels = [subdir for _ in range(len(faces))]
		# summarize progress
		print('>loaded %d examples for class: %s' % (len(faces), subdir))
		# store
		X.extend(faces)
		y.extend(labels)
	return asarray(X), asarray(y)

def main():
	ap = argparse.ArgumentParser()
	ap.add_argument('-td', '--train_data', required=True)
	ap.add_argument('-vd', '--val_data', required=True)
	ap.add_argument('-sd', '--save_data', required=True)
	args = vars(ap.parse_args())

	# load train dataset
	trainX, trainy = load_dataset(args['train_data'])
	print(trainX.shape, trainy.shape)
	# load test dataset
	testX, testy = load_dataset(args['val_data'])
	# save arrays to one file in compressed format
	savez_compressed(args['save_data'], trainX, trainy, testX, testy)

if __name__ == '__main__':
	main()
Chạy code trên:
$ python extract_faces_dataset.py --train_data 5-celebrity-faces-dataset/train/ --val_data 5-celebrity-faces-dataset/val/ --save_data 5-celebrity-faces-dataset.npz
Sẽ mất một chút thời gian để hoàn thành chương trình. Tất cả các khuôn mặt ở 2 tập train và test được lưu vào một tệp mảng NumPy nén có tên là 5-Celeb-face-dataset.npz có dung lượng khoảng 7.5MB và được lưu trữ trong thư mục làm việc hiện tại của chương trình.
>loaded 17 examples for class: elton_john
>loaded 19 examples for class: madonna
>loaded 13 examples for class: ben_afflek
>loaded 22 examples for class: mindy_kaling
>loaded 21 examples for class: jerry_seinfeld
(92, 160, 160, 3) (92,)
>loaded 5 examples for class: elton_john
>loaded 5 examples for class: madonna
>loaded 5 examples for class: ben_afflek
>loaded 5 examples for class: mindy_kaling
>loaded 5 examples for class: jerry_seinfeld
5.3 Tạo Face Embedding vectors
Bước tiếp theo là tạo ra các Face Embedding vectors của mỗi khuôn mặt. Nhớ lại rằng Face Embedding là một vectơ đại diện cho các đặc điểm được trích xuất từ khuôn mặt. Các vectors này sau đó có thể được dùng để tính toán, so sánh với nhau, hoặc tạo ra một bộ phân loại để định danh cho từng khuôn mặt. Ở phần này, chúng ta sẽ dùng mô hình Pre-trained FaceNet để tạo ra các Face Embdding vectors đó.
Đầu tiên, chúng ta sẽ đọc vào các khuôn mặt đã tạo ở bước trước.
...
# load the face dataset
data = load('5-celebrity-faces-dataset.npz')
trainX, trainy, testX, testy = data['arr_0'], data['arr_1'], data['arr_2'], data['arr_3']
print('Loaded: ', trainX.shape, trainy.shape, testX.shape, testy.shape)
Tiếp theo, đọc vào Pre-trained FaceNet model:
...
# load the facenet model
model = load_model('facenet_keras.h5')
print('Loaded Model')
Chuẩn hóa dữ liệu đầu vào theo đúng kỳ vọng của Pre-trained FaceNet:
...
# scale pixel values
face_pixels = face_pixels.astype('float32')
# standardize pixel values across channels (global)
mean, std = face_pixels.mean(), face_pixels.std()
face_pixels = (face_pixels - mean) / std

...
# transform face into one sample
samples = expand_dims(face_pixels, axis=0)
Tạo Face Embedding vectors:
...
# make prediction to get embedding
yhat = model.predict(samples)
# get embedding
embedding = yhat[0]
Viết chung lại thành hàm get_embedding() như bên dưới:
# get the face embedding for one face
def get_embedding(model, face_pixels):
	# scale pixel values
	face_pixels = face_pixels.astype('float32')
	# standardize pixel values across channels (global)
	mean, std = face_pixels.mean(), face_pixels.std()
	face_pixels = (face_pixels - mean) / std
	# transform face into one sample
	samples = expand_dims(face_pixels, axis=0)
	# make prediction to get embedding
	yhat = model.predict(samples)
	return yhat[0]
Code đầy đủ từ lúc đọc vào ảnh khuôn mặt, đến khi lưu Face Embedding vector thành 1 file như sau:
# USEAGE:
# python predict_face_embeddings.py --face_dataset 5-celebrity-faces-dataset.npz --facenet_model facenet_keras.h5 --face_embedding 5-celebrity-faces-embeddings.npz

# calculate a face embedding for each face in the dataset using facenet
from numpy import load
from numpy import expand_dims
from numpy import asarray
from numpy import savez_compressed
from tensorflow.keras.models import load_model
import argparse

import tensorflow as tf
tf.get_logger().setLevel('ERROR')
config_tf = tf.compat.v1.ConfigProto()
config_tf.gpu_options.allow_growth = True
session = tf.compat.v1.Session(config=config_tf)

# get the face embedding for one face
def get_embedding(model, face_pixels):
	# scale pixel values
	face_pixels = face_pixels.astype('float32')
	# standardize pixel values across channels (global)
	mean, std = face_pixels.mean(), face_pixels.std()
	face_pixels = (face_pixels - mean) / std
	# transform face into one sample
	samples = expand_dims(face_pixels, axis=0)
	# make prediction to get embedding
	yhat = model.predict(samples)
	return yhat[0]

def main():
	# load the face dataset
	data = load(args['face_dataset'])
	trainX, trainy, testX, testy = data['arr_0'], data['arr_1'], data['arr_2'], data['arr_3']
	print('Loaded: ', trainX.shape, trainy.shape, testX.shape, testy.shape)
	# load the facenet model
	model = load_model(args['facenet_model'])
	print('Loaded Model')
	# convert each face in the train set to an embedding
	newTrainX = list()
	for face_pixels in trainX:
		embedding = get_embedding(model, face_pixels)
		newTrainX.append(embedding)
	newTrainX = asarray(newTrainX)
	print(newTrainX.shape)
	# convert each face in the test set to an embedding
	newTestX = list()
	for face_pixels in testX:
		embedding = get_embedding(model, face_pixels)
		newTestX.append(embedding)
	newTestX = asarray(newTestX)
	print(newTestX.shape)
	# save arrays to one file in compressed format
	savez_compressed(args['face_embedding'], newTrainX, trainy, newTestX, testy)

if __name__ == '__main__':
	ap = argparse.ArgumentParser()
	ap.add_argument('-fd', '--face_dataset', required=True)
	ap.add_argument('-fnm', '--facenet_model', required=True)
	ap.add_argument('-fe', '--face_embedding', required=True)
	args = vars(ap.parse_args())

	main()
Chạy code trên:
$ python predict_face_embeddings.py --face_dataset 5-celebrity-faces-dataset.npz --facenet_model facenet_keras.h5 --face_embedding 5-celebrity-faces-embeddings.npz
Kết quả, toàn bộ ảnh khuôn mặt đã được chuyển đổi thành các Face Embedding vectors 128 chiều. Tất cả được lưu lại thành file 5-celebrity-faces-embeddings.npz trong cùng thư mục làm việc.
Loaded: (93, 160, 160, 3) (93,) (25, 160, 160, 3) (25,)
Loaded Model
(93, 128)
(25, 128)
5.4 Thực hiện Face Classification
Trong phần này, chúng ta sẽ phát triển một mô hình để phân loại các Face Embedding vectors thành 5 nhãn là tên của những người nổi tiếng trong bộ dữ liệu 5 Celebrity Faces Dataset. Đầu tiên, đọc vào Face Embedding vectors ở phần trước:
...
# load dataset
data = load('5-celebrity-faces-embeddings.npz')
trainX, trainy, testX, testy = data['arr_0'], data['arr_1'], data['arr_2'], data['arr_3']
print('Dataset: train=%d, test=%d' % (trainX.shape[0], testX.shape[0]))
Để train Classifier model, chúng ta cần chuẩn hóa dữ liệu:
...
# normalize input vectors
in_encoder = Normalizer(norm='l2')
trainX = in_encoder.transform(trainX)
testX = in_encoder.transform(testX)

..
# label encode targets
out_encoder = LabelEncoder()
out_encoder.fit(trainy)
trainy = out_encoder.transform(trainy)
testy = out_encoder.transform(testy)
Tiếp theo, chúng ta sẽ tạo và huấn luyện một SVM model. Thuật toán này đã được chứng mình tính hiệu quả trong việc phân loại các Face Embedding vectors.
...
# fit model
model = SVC(kernel='linear')
model.fit(trainX, trainy)

...
# predict
yhat_train = model.predict(trainX)
yhat_test = model.predict(testX)
# score
score_train = accuracy_score(trainy, yhat_train)
score_test = accuracy_score(testy, yhat_test)
# summarize
print('Accuracy: train=%.3f, test=%.3f' % (score_train*100, score_test*100))
Sau khi huấn luyện xong model, ta sẽ thử dự đoán một người ngẫu nhiên trong tập Test.
...
# test model on a random example from the test dataset
selection = choice([i for i in range(testX.shape[0])])
random_face_pixels = testX_faces[selection]
random_face_emb = testX[selection]
random_face_class = testy[selection]
random_face_name = out_encoder.inverse_transform([random_face_class])
...
# prediction for the face
samples = expand_dims(random_face_emb, axis=0)
yhat_class = model.predict(samples)
yhat_prob = model.predict_proba(samples)
...
# get name
class_index = yhat_class[0]
class_probability = yhat_prob[0,class_index] * 100
predict_names = out_encoder.inverse_transform(yhat_class)
...
print('Predicted: %s (%.3f)' % (predict_names[0], class_probability))
print('Expected: %s' % random_face_name[0])
...
# plot for fun
pyplot.imshow(random_face_pixels)
title = '%s (%.3f)' % (predict_names[0], class_probability)
pyplot.title(title)
pyplot.show()
Tổng hơp hết lại, ta có code đầy đủ như sau:
# USEAGE:
# python random_face_identity_classification.py --face_dataset 5-celebrity-faces-dataset.npz --face_embedding 5-celebrity-faces-dataset.npz

# develop a classifier for the 5 Celebrity Faces Dataset
from random import choice
from numpy import load
from numpy import expand_dims
from sklearn.preprocessing import LabelEncoder
from sklearn.preprocessing import Normalizer
from sklearn.svm import SVC
from matplotlib import pyplot
import argparse

def main():
    ap = argparse.ArgumentParser()
    ap.add_argument('-fd', '--face_dataset', required=True)
    ap.add_argument('-fe', '--face_embedding', required=True)
    args = vars(ap.parse_args())

    # load faces
    data = load(args['face_dataset'])
    testX_faces = data['arr_2']
    # load face embeddings
    data = load(args['face_embedding'])
    trainX, trainy, testX, testy = data['arr_0'], data['arr_1'], data['arr_2'], data['arr_3']
	print('Dataset: train=%d, test=%d' % (trainX.shape[0], testX.shape[0]))
    # normalize input vectors
    in_encoder = Normalizer(norm='l2')
    trainX = in_encoder.transform(trainX)
    testX = in_encoder.transform(testX)
    # label encode targets
    out_encoder = LabelEncoder()
    out_encoder.fit(trainy)
    trainy = out_encoder.transform(trainy)
    testy = out_encoder.transform(testy)
    # fit model
    model = SVC(kernel='linear', probability=True)
    model.fit(trainX, trainy)
    # predict
    yhat_train = model.predict(trainX)
    yhat_test = model.predict(testX)
    # score
    score_train = accuracy_score(trainy, yhat_train)
    score_test = accuracy_score(testy, yhat_test)
    # summarize
    print('Accuracy: train=%.3f, test=%.3f' % (score_train*100, score_test*100))


    # test model on a random example from the test dataset
    selection = choice([i for i in range(testX.shape[0])])
    random_face_pixels = testX_faces[selection]
    random_face_emb = testX[selection]
    random_face_class = testy[selection]
    random_face_name = out_encoder.inverse_transform([random_face_class])
    # prediction for the face
    samples = expand_dims(random_face_emb, axis=0)
    yhat_class = model.predict(samples)
    yhat_prob = model.predict_proba(samples)
    # get name
    class_index = yhat_class[0]
    class_probability = yhat_prob[0,class_index] * 100
    predict_names = out_encoder.inverse_transform(yhat_class)
    print('Predicted: %s (%.3f)' % (predict_names[0], class_probability))
    print('Expected: %s' % random_face_name[0])
    # plot for fun
    pyplot.imshow(random_face_pixels)
    title = '%s (%.3f)' % (predict_names[0], class_probability)
    pyplot.title(title)
    pyplot.show()

if __name__ == '__main__':
    main()
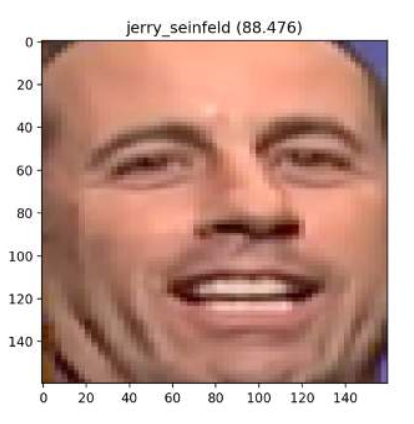
Kết quả chạy code:
Dataset: train=93, test=25
Accuracy: train=100.000, test=100.000

Predicted: jerry_seinfeld (88.476)
Expected: jerry_seinfeld
Kèm theo hình ảnh của người được lựa chọn để dự đoán:
6. Kết luận
Trong bài này, chúng ta đã khám phá cách phát triển hệ thống nhận diện khuôn mặt bằng mô hình FaceNet và bộ phân loại SVM. Cụ thể:
- Giới thiệu về mô hình FaceNet.
- Cách chuẩn bị dữ liệu để huấn luyện hệ thống.
- Cách huấn luyện mô hình và sử dụng mô hình đã huấn luyện để tạo dự đoán.
Toàn bộ source code của bài này, các bạn có thể tham khảo tại đây
Trong bài tiếp theo, chúng ta sẽ cùng nhau tìm hiểu về mô hình Siamese. Mời các bạn đón đọc.
7. Tham khảo